Excel Flash Fill
Every time a new version of Excel is released there are always new features that are hard to find and learn for those that have been using Excel for a long time. I tend to use the same functions and features that I originally used and don’t even notice new things on the menus. So today, I hope to help the new and old with a cool new (but kinda old) feature in Excel 2013 and Excel 2016 that you may not know about.
That option is Flash Fill. Now like I stated above, it is not an extremely new feature as it was released in Excel 2013, but it is something that you may have missed. Here is what it the Excel Flash Fill does:
If you have data in your spreadsheet, go to an adjacent column and enter in a couple of examples you want as output and Excel Flash Fill will Automatically fill in values for you for the entire column. Essentially, Excel is building a Text transformation formula for you to parse the data string.
For example, let’s say you have email addresses and you want to create columns of data with the person’s first name and last name and company name. You NO longer have to create 3 formulas using the LEFT, MID and RIGHT text functions in Excel. Excel Flash fill will do the heavy lifting for you.
Remember, this is a feature of Excel 2013 and Excel 2016 so yet another great reason to upgrade from Excel 2010.
The Breakdown
1) Add Sample Data in Adjacent Column
2) Click on Flash Fill Button
Step-by-Step
1) Add Sample Data in Adjacent Column
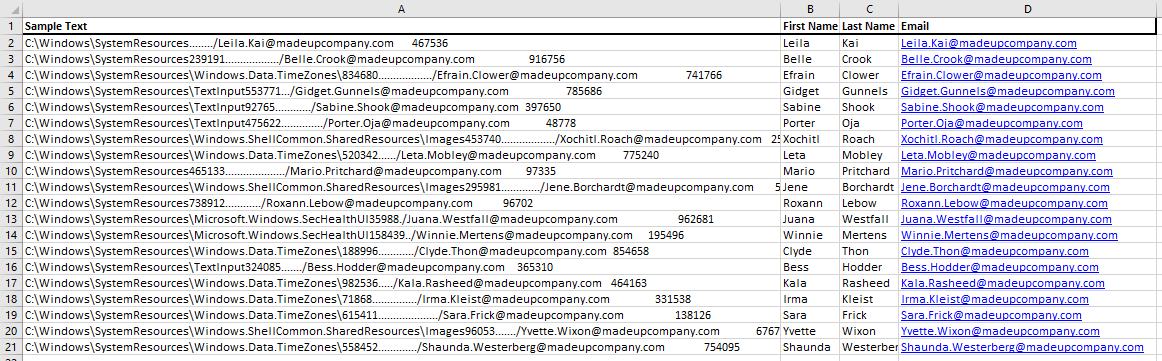
As you can see in the sample below, we have email addresses of [email protected]. If we wanted a column of data that just lists the First Name, we can simply type a sample in the format of how we want the data to appear in an adjacent column. As you see here, we entered Leila in Column B with our large text string in column A.

You can also create other columns of data as we have done for Last Name and Email Address to parse out those data points from Column A.
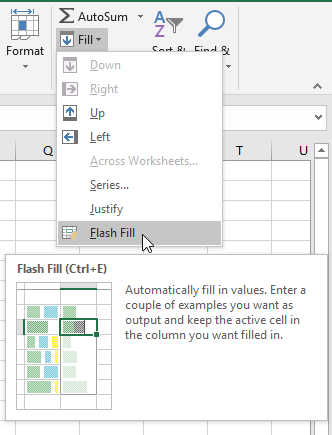
2) Click on Flash Fill Button
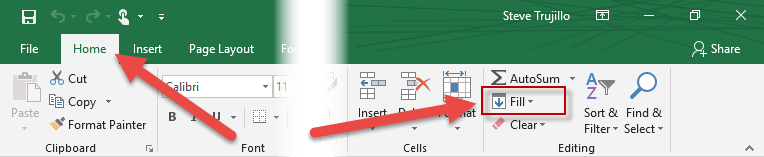
Next, navigate to the Excel Flash Fill option by going to the Home Ribbon then click on the Fill drop down menu on the right
Then select Flash Fill:
And your resulting data will be created by the Excel Flash Fill feature. Then repeat selecting the button for any more adjacent columns as done here for Last Name and Email Address:
With Excel Flash Fill, I can get my data parsed from a larger data string simply by typing in the example of what I want to appear and no longer do I have to spend time writing formulas for that data. That will leave more time for my Excel data crunching and dashboard development.
Bonus features, if you want your final data in a different format you can enter that as your example and Excel will change the resulting data as the example. For instance, if we wanted our First Names in all Caps, just enter your sample data with All Caps “LEILA” and Excel Flash Fill will create all the data with an All Caps format.
You can also add in other formatting in between, like dashes in phone numbers. If your data for phone numbers only have the numbers and no dashes (like 123456789), add the “-” in your sample before you press Flash Fill (like 123-456-789) and your final data will include the dashes. This will save time writing that formula too.
Video Demonstration
Check out this Video tutorial on the techniques presented above.

Click here to Download the Free Sample Excel Template File:
Flash-Fill-Excel-Sample.xlsx
Excel continues to amaze me that they keep making it better and better. So keep looking for the new features that will save you time. I honestly never even gave the Fill menu a thought on the Home Ribbon, but now I won’t forget this feature. What new features of Excel 2016 do you like over previous versions and what do you not like? Let me know in the comments below.
Steve=True


