Hack Excel Protect Workbook
So you
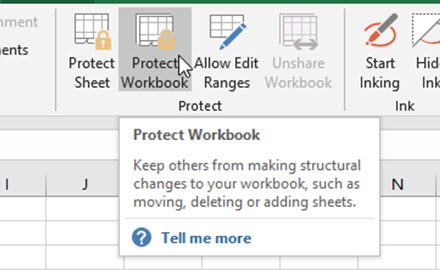
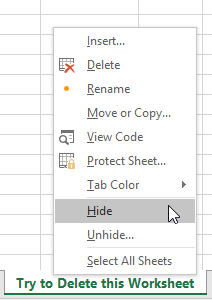
So what would you want to use the Excel Protect Workbook feature? This feature locks users from editing the structures of the workbook. Like Unhiding or Hiding Worksheets, Changing Tab Colors, Move or Copy Worksheets, Renaming Worksheets, Inserting or Deleting Worksheets. But
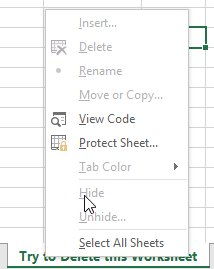
The Breakdown
1) Open File Explorer
2) Change View Show/Hide Options
3) Change File Extension to .ZIP
4) Extract Files and Open workbook.xml File in Text Editor
5) Remove Protection Section
6) Create New .ZIP File
7) Change File Extension to .XLSX
Step-by-Step
1) Open File Explorer
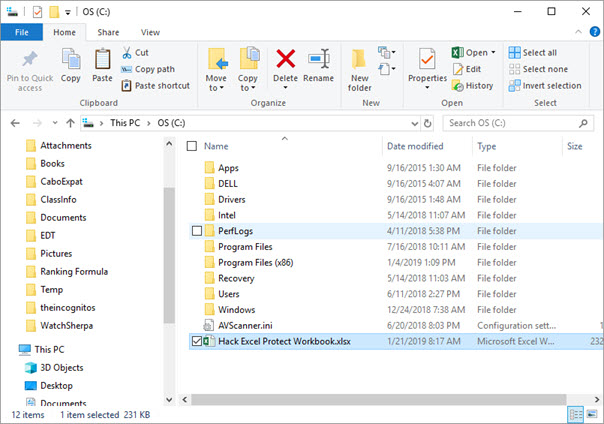
First, we need to modify the extension of the Excel file to a .ZIP file. Essentially, if you didn’t know, all Excel files are just a mashup of several XML files. All your data and settings are in these files. Excel is a zipped file of these files, but to have Excel run/modify the file, you need an .XSLX file extension. In order to Hack Excel Protect Workbook feature, we need to see these files.
The easiest way to do this is to open Windows File Explorer and locate the Excel Workbook you want to Hack.
2) Change View Show/Hide Options
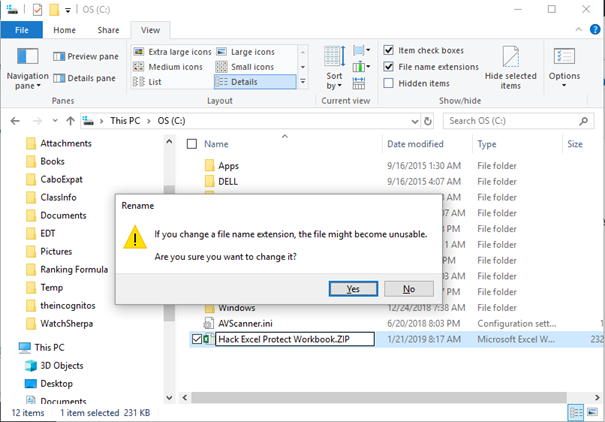
Next, make sure you have your Show/Hide Options turned ON for “File Name Extensions” as you see here on the View Menu within the Windows File Explorer.

NOTE: If you do NOT have this option enabled, if you try and rename the file, it will not work unless you are changing the actual extension. A simple rename will only make your file like this: “Original.xlsx” to “Original.zip.xlsx”.
3) Change File Extension to .ZIP
If you are showing “File Name Extensions” in Windows File Explorer, this is an easy step. Just change the name from Filename.xlsx to Filename.zip. Press OK when prompted to change the file extension.
4) Extract Files and Open workbook.xml File in Text Editor
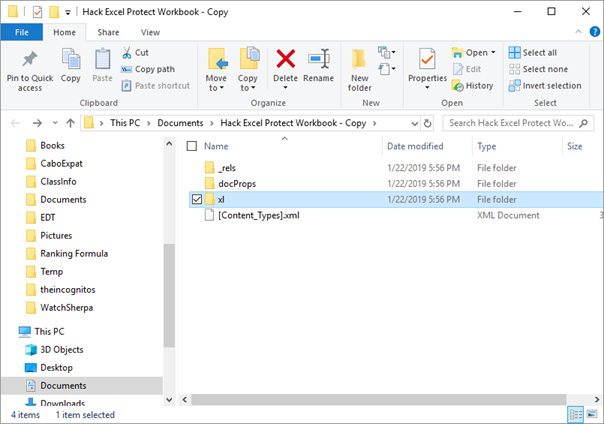
Now that you have changed the file extension, we can easily Hack Excel Protect Workbook with a few more steps. First, you need to extract the files from the ZIP file into a folder on your computer as you see here:

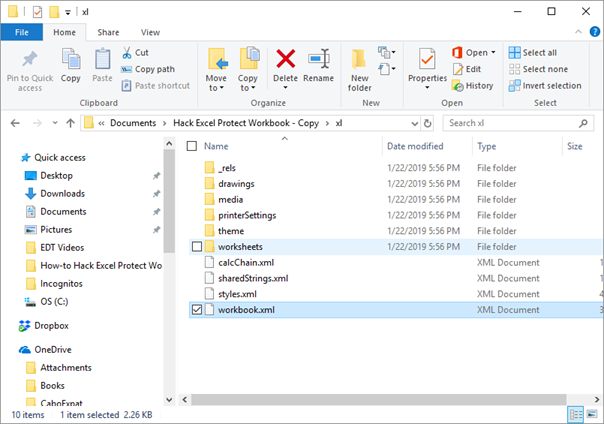
Once you have extracted the files, open the “xl” folder
and find the “workbook.xml” file.
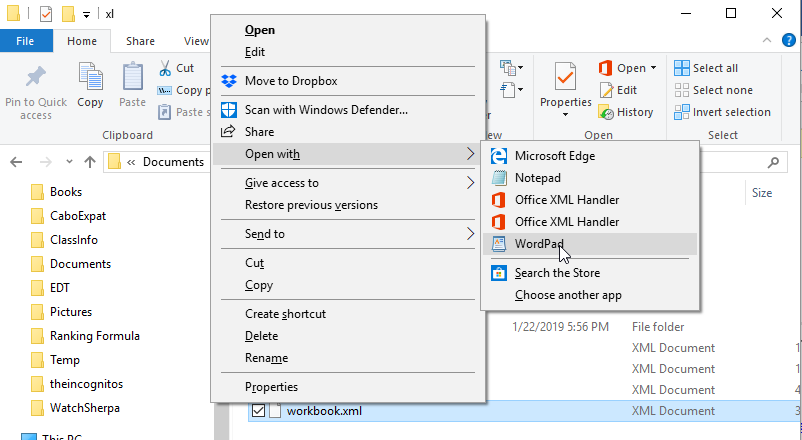
Then right click and choose “open with” from the popup menu and pick WordPad or NotePad as your editor. I am using WordPad here.
5) Remove Protection Section
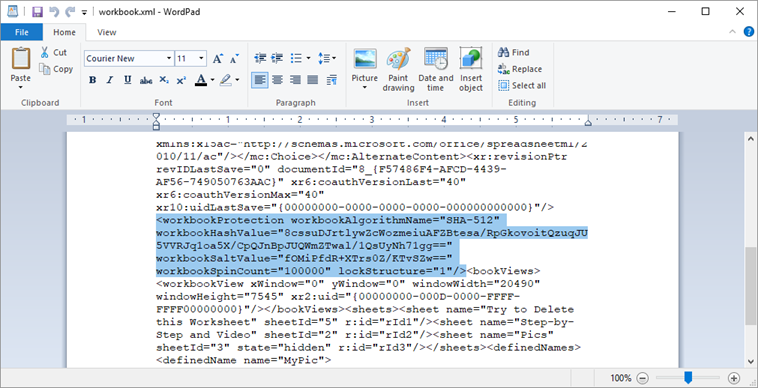
In this file we need to find the following text “<workbookProtection”. Once you have found that, locate the very next “>” text. Highlight and delete from the “<workbookProtection” to “>” as you see here. Then save the file.
6) Create New .ZIP File
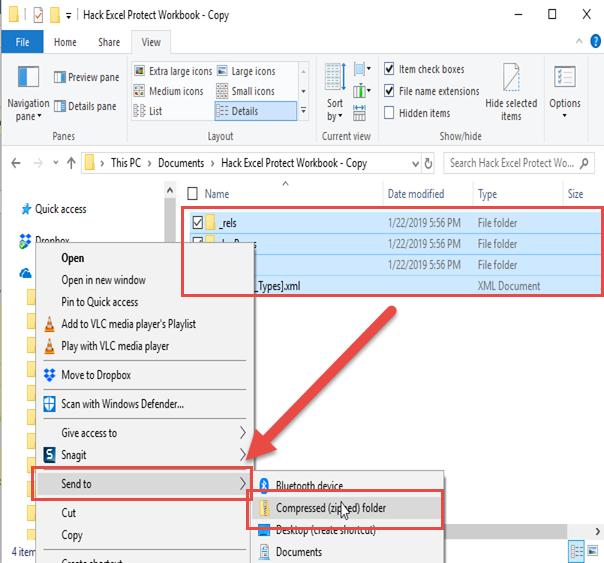
Next step is to return to the folder with all of the Extracted files. Then highlight/select all of the files and right click on them. In the popup menu, select “Send To” and then select “Compressed (zipped) Folder” as you see here:
7) Change File Extension to .XLSX
The last of the Hack Excel Protect Workbook steps is to rename the .Zip file back to .XLSX and make Excel open the grouping or xml files. Simply change the extension in Windows File Explorer from zip to xlsx. Your Hack is now completed and you can now change the structure of your spreadsheet.
This is an easy way to Hack Excel Protect Workbook. Also check out this video if you are looking to Hack Excel Sheet Protection: UnprotectWorksheetForgottenPasscode
Note: This will not hack Excel File Encryption. To break this, the only solution I have seen is to buy a software program. But let me know in the comments below if you have another solution.
Video Demonstration
Here is a quick Video tutorial on the Excel hack techniques presented above.
Sample File
Here is a sample file you can use to practice this technique:
SampleHackExcelProtectWorkbook.xlsx
Now you know a lot more on how Excel builds your file and how you can use that knowledge to your advantage. Let me know in the comments below if you know of any other techniques I should share on the site.
Steve=True


